Home Extension
Home Extension
Universal Home Build was asked to plan and construct a rear extension to a property in the Maidstone area. The extension would provide our client with more family space, along with creating a contemporary, open planned style of living for the ground floor.
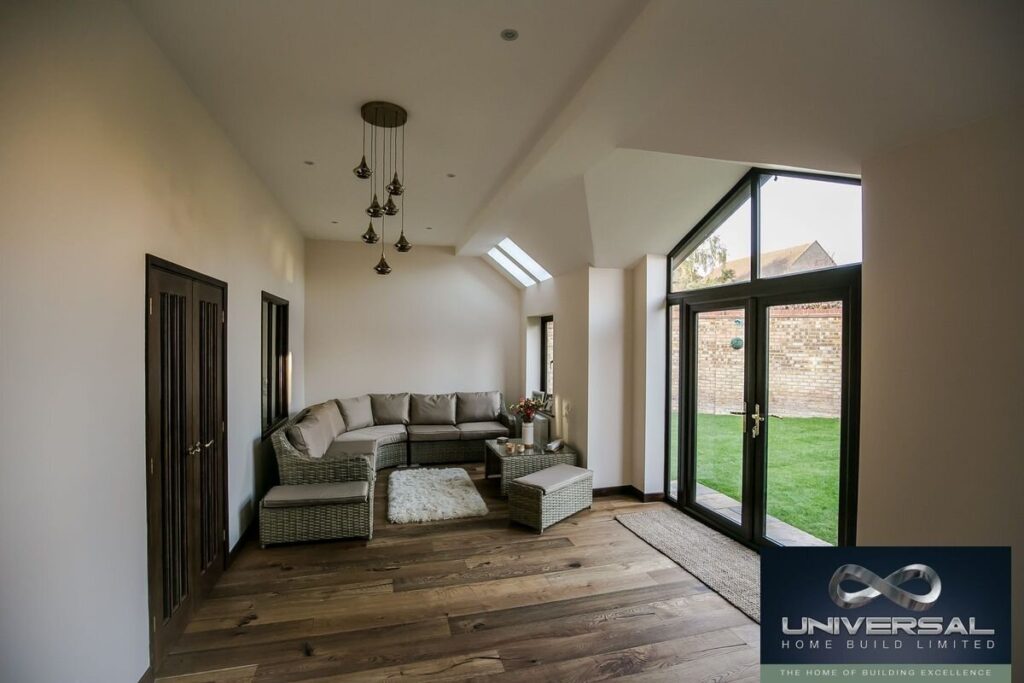
The planned extension was to a high-quality finish to match what was already an impressive family home. The additional living space provided by the extension would connect the garden and outside living space via large doors leading to the garden with plenty of natural light through the use of cleverly positioned windows.
Plans to create more light and space
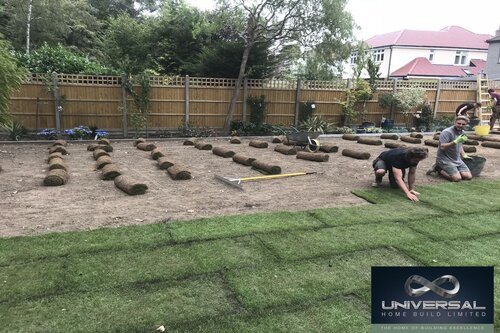
Plans were drawn up by the architect to determine the aesthetic of the extension. Meanwhile the construction area was prepared including the removal of the existing patio along with the dwarf wall that separated the patio area from the rest of the garden. The patio was removed as this would provide the foundations for where the extension was to be built.
The foundations needed to be excavated to a depth as required by the local authority Building Inspector. These foundations had to be underpinned into the existing house’s foundations in order to ensure construction stability. The concrete pour had to be completed in one continuous program. Upon the completion of the concrete foundations the sub-structure could begin to take form. This included the use of concrete block work along with block and beam style flooring supports. The walls of the structure were constructed to utilise a clear 100mm cavity with all block and brickwork being tied using stainless steel wall ties.
As well as the initial erection of the foundations and blockwork, new drainage was required as the sole service for the planned construction. This meant the diversion of any existing drainage using standard 100mm diameter pipework requiring any change of direction within the pipe work to have 600mm diameter manhole covers installed in order for maintenance access.
Once the initial foundations, sub-structure and services were prepared and installed, work started on constructing the extensions superstructure. This was formed of two skins of brick/block work along with a fully insulated 100mm cavity between the outer and inner skin of each external wall. The methodology of construction for this two-skin build required that the external skin was using facing brickwork to match that of the existing house, and 3.5n thermal blockwork on the interior. This style of construction ensured the extension’s economical use of energy and heat retention.
All constructed walls were properly isolated using high grade DPC (damp proof course) throughout along with the use of cavity trays above all air bricks. The cavity trays are implemented to prevent any dampness permeating the internal skin of the walls. This is achieved by the cavity trays draining away any rainwater back outside the outer skin of the walls.
Roof support
Following the completion of the external wall’s, work on the extensions roof began. This is always a vital step in any construction project as establishing the roof provides the interior of the structure to remain dry throughout the next phases of construction, allowing for finishes and fittings to be installed.
The roof construction was to use treated and stress graded timbers, these timber joists and structural supports were to be securely fixed in place using proprietary stainless-steel jiffy hangers, wall plate hangers and fixing plates.
The extension consisted of two types of roof construction, both pitched and flat roofs would be present. The flat roof was completed using 18mm WBP plywood decking, this decking had a weathered and heat-sealed PVC membrane applied to it in order to protect both the plywood decking and the timber supports from varying weather conditions.
Upon construction the pitched roof was tiled using matching tiles of the existing building. Once the actual construction of the extension was finished (the floors, walls and the roof), work upon fitting out the interior of the extension could then begin. This happened in several phases, from electrical work through to plastering and decoration.
Electrics Plumbing and Plasterboarding
The first steps towards finishing the project were to have the electrical, plumbing and heating services installed. This required wiring of the new extension, for new sockets, light fittings etc, and the plumbing and heating that ensured there was sufficient heat provided throughout the extension by means of underfloor heating, which would be controlled by an independent thermostat. Having finished the electrical and plumbing tasks, the process of plaster boarding the extension could begin.
The plasterboard used to complete the interior of the extension was 12.5mm Gyproc duplex foil backed plasterboard to the ceilings. Due to the nature of the ceilings shape, applying the plasterboard would take time and precision to achieve the very highest quality finish. Our technicians were required to work out specific angles in which to cut and apply the plasterboard in order to achieve the exact aesthetic that was required by our client. The shapes created by the plasterboard were designed to increase the effect of the natural light and serve to make the space brighter and appear larger in size, so it was vital the initial plaster boarding was installed correctly.
The interior would require plastering to a high-quality finish. There would need to be new architraves and doors hung and the fitting of the French doors was to be installed providing access to a newly laid patio area.
The previous instalments would allow for a new engineered oak flooring to be installed throughout the extension, followed by decoration throughout.
Case Study Results
The finished project at Samphire Close in Maidstone provided our client with a whole new space to enjoy. It improved the quality of their home offering them contemporary open-planned living that enabled the family to enjoy more time together.
The extension was constructed using high quality materials and modern building techniques which, enabled the extension to achieve its final aesthetic identified in the plans. The extension created a flow throughout the ground floor of the property which started as you enter the house and took you through to the garden. The new construction created an increase in natural light, which affected the entire ground floor making it a brighter and warmer home.
Our client was very pleased and commended Universal Home Build on it’s elite level of build and finish.
BS8102: 2009 sets out the scope and limitations for below ground structures, areas covered include:
-
Remove existing patio slabs and dwarf wall to garden
-
Excavate foundations to depth as required by Local Authority Building Inspector
-
Tie in or underpin existing foundation to rear of property ensuring that new foundations are contiguous with existing
-
Pour foundations using GEN3 Concrete
-
Construct substructure blockwork using 7n concrete block in a 300mm wide structural wall leaving a 100mm clear cavity
-
All blockwork and brickwork are to be tied across the cavity using stainless steel wall ties
-
On completion of sub-structure blockwork, backfill cavity to within 225mm of DPC with lean mix concrete
-
Divert any existing drainage around new extension
-
The superstructure is to be built in two skins with a 100mm fully insulated cavity
-
The internal skin is to be formed in 3.5n thermal blockwork
-
DPC and cavity trays are to be in Hyload. Cavity trays are to be placed above all air bricks and are to be tied to the horizontal DPC
-
All steel work is to be placed on engineering brick pad stones and shimmed to be level and parallel to the existing building
-
The roof construction is to be formed in treated and stress graded timber using 100x50mm wall plate, 175x50mm jack rafters, 190×25 valley and ridge boards
-
The timbers are to be securely fixed using proprietary stainless-steel hangers, wall plate hangers and fixing plates
-
The flat roof area is to be decked using 18mm WBP plywood and weathered with a single layer PVC membrane
-
The pitched roof is to be tiled with plain tiles to match the main existing roof
-
Cables in walls and ceilings will be routed in accordance with the guidelines laid down by the IEE
-
Supply & fit underfloor heating system to extension room
-
Supply and fix 12.5mm Gyproc duplex foil backed plasterboard to Ceilings
-
Plaster using two coat work as follows: Backing coat Carlite Browning; Setting coat Carlite Finish


